2편(CLI 구축) 보러가기
프론트엔드 전체 테스트 환경 구축해보기(2.CLI)
1편(설계) 보러가기https://jjongsk.tistory.com/entry/1%ED%94%84%EB%A1%A0%ED%8A%B8%EC%97%94%EB%93%9C-%EC%A0%84%EC%B2%B4-%ED%85%8C%EC%8A%A4%ED%8A%B8-%ED%99%98%EA%B2%BD-%EA%B5%AC%EC%B6%95%ED%95%B4%EB%B3%B4%EA%B8%B0%EC%84%A4%EA%B3%84 프론트엔드 전
jjongsk.tistory.com
개요
전체 테스트 환경 구축의 목표는 테스트 실행 시 테스트 세션을 준비할 필요가 없도록 하는 것, 여러개의 테스트 실행 시 각 테스트마다 매 번 새로운 세션을 만들필요 없이 기존 세션을 재활용하여 전체 테스트 시간을 감소시키는 것이다.
전체적인 동작 방식은 아래와 같다.
개발자들이 개발 서버 실행했을 때 테스트가 동작할 테스트 세션이 같이 실행된다.
이후 개발자가 테스트를 실행했을 때 테스트 서버에서 테스트 세션 서버로 웹 소켓을 통해 테스트를 요청하며 테스트를 실행하고 결과를 응답해준다. 테스트 서버에서는 이를 실시간으로 출력시키는 방식으로 동작한다.
개발
먼저 개발 서버 실행 시 함께 실행될 테스트 세션 실행 코드를 작성해준다.
import { openBrowser } from './browser/opener';
const config = {
    host: 'localhost',
    port: 30002,
    open: true,
    viewEngine: 'pug',
    views: [
        {
            path: '/public',
            root: '...',
        },
    ],
    statics: [
	      // 스태틱 파일 경로 정의
    ],
};

runTestSessionServer(config);
다음으로 아래는 테스트 실행 서버 코드이다.
import yargs from 'yargs';
import { runTestServer } from './server';
import { hideBin } from 'yargs/helpers';

const config = {
    host: 'localhost',
    port: 30003,
};

const argv = yargs(hideBin(process.argv)).string('targetFsPath').boolean('force').argv;

const options = argv as { targetFsPath: string; force?: boolean };

runTestServer(config, options);
테스트 세션 서버 내부에서는 pug라는 템플릿 언어를 사용하여 ui 템플릿을 호출하여 테스트용 화면을 구성해준다. 이 템플릿 내부에서 react 컴포넌트를 호출하며 해당 컴포넌트에서는 별도의 authorization 과정 없이도 정상적으로 화면이 출력되도록 개발해주면 된다.
아래는 테스트 세션 서버의 프로토타입 구현부이다.
import fastify from 'fastify';
import fastifyView from '@fastify/view';
import fastifyStatic from '@fastify/static';
import pug from 'pug';

export const runTestSessionServer = (config: any) => {
    const app = fastify({ logger: true });

    for (const viewInfo of config.views) {
        app.register(fastifyView, {
            engine: {
                pug,
            },
            templates: viewInfo.root,
        });
    }

    for (const staticInfo of config.statics) {
        app.register(fastifyStatic, {
            root: staticInfo.root,
            prefix: staticInfo.prefix,
            decorateReply: false,
        });
    }

    app.get('/test-session', async (request, reply) => {
        return reply.view('test-session');
    });

    app.listen(
        {
            port: config.port,
            host: config.host,
        },
        (err, address) => {
            if (err) {
                app.log.error(err);
                process.exit(1);
            }
            app.log.info(`server listening on ${address}`);
        }
    );
};
세션 서버는 단순하게 pug 파일을 웹의 특정 경로에서 보여주게만 만들어준다. 핵심 로직은 모두 pug 파일과 그곳에서 실행하는 자바스크립트 파일에 있으며 이 곳에서는 no-auth를 위한 각종 로직들, 테스트를 위한 여러가지 준비, 실제 UI 코드 등이 포함되어 있다.
test-session.pug 파일은 아래와 같이 구성되어 있다.
doctype html
html
  head
    title Frontend Test Runner
  body
    div(id="app-container")
    script(src='/public/js/no_auth_app.js')
    script(src='/public/js/ec_testcase_runner.js')
    script(src='/public/js/bind-sessions.js')
    script.
      document.addEventListener('DOMContentLoaded', async function() {
        try{
          await bindSessions();
        } catch(e) {
          console.error(e);
        } finally {
          startNoAuthApp();
        }
      });
실행 명령어를 입력해보면 정상적으로 웹페이지가 출력되는 것을 확인할 수 있다.

다음으로는 테스트 실행 서버 코드를 작성해준다. 아래는 실행 코드이다.
import fastify from 'fastify';
import { testRunnerRoute } from './routes/test-runner';
import WebSocket from 'ws';

export const runTestServer = async (config: any, options: { targetFsPath: string; force?: boolean }) => {
    const app = fastify({ logger: true });
    app.register(require('@fastify/websocket'));
    app.register(async function (fastify) {
        (fastify.get as any)('/test-runner', { websocket: true }, testRunnerRoute);
    });

    app.listen(
        {
            port: config.port,
            host: config.host,
        },
        async (err, address) => {
            if (err) {
                app.log.error(err);
                process.exit(1);
            }
            app.log.info(`server listening on ${address}`);

            const socket = new WebSocket('ws://localhost:30003/test-runner'); // 웹소켓 서버의 주소

            socket.on('open', () => {
                console.log('Connected to the server');

                // JSON 문자열로 변환하여 서버에 메시지 전송
                socket.send(JSON.stringify(options));
            });

            socket.on('message', (message: Buffer) => {
                console.log(message.toString('utf-8'));
            });

            socket.on('close', () => {
                console.log('Connection closed by the server');
                console.log('Closing the server');
                // app.close(() => {
                //     process.exit(0);
                // });
            });

            socket.on('error', (error) => {
                console.error('WebSocket error:', error);
            });
        }
    );
};
이 역시 단순하게 test-runner를 위한 실행 서버이며 실 구현부는 testRunnerRoute 함수 내에 정의되어있다. 해당 함수에서는 puppeteer를 사용하여 프론트엔드 테스트를 실행하고 socket을 통해 결과 값을 반환하는 코드가 구현되어 있다.
웹 소켓을 사용한 이유는 이를 통해 서버에서 반환하는 테스트 결과 값을 실시간으로 출력할 수 있게하기 위함이다. 굳이 양방향 통신이 필요한 내용은 아니니 추후 Server-Sent Events 사용이 가능한지를 확인해보고 변경하는 것을 고려해본다.
testRunnerRoute 는 아래와 같이 구현되어 있다. 테스트를 위한 경로 내의 테스트 파일을 찾은 뒤 테스트를 실행시켜주는 역할을 한다.
import { ISessionInfo, pathParser } from '../utils/path-parser';
import puppeteer, { ConsoleMessage } from 'puppeteer';

declare const window: any;

async function handleWithPuppeteer({
    onMessage,
    onEnd,
    pathList,
}: {
    pathList: {
        testPath: string;
        sessionInfo: ISessionInfo;
    }[];
    onEnd: () => void;
    onMessage: (message: any) => void;
}) {
    // 테스트 로직...
}

export const testRunnerRoute = async (socket: any) => {
    const onMessage = (message: any) => {
        socket.send(JSON.stringify(message?.message));
    };

    const onEnd = () => {
        // task 큐에 있는 모든 작업이 완료되는 것을 기다린 후에 socket을 닫는다.
        setTimeout(() => {
            socket.close();
        }, 1000);
    };

    socket.on('open', () => {
        socket.send('Server connected');
    });

    socket.on('close', () => {
        console.log('Server disconnected');
    });

    socket.on('error', (error: any) => {
        console.error('Server WebSocket error:', error);
    });

    // main
    socket.on('message', async (message: Buffer) => {
        try {
            const messageString = message.toString('utf-8');
            const { targetFsPath, force } = JSON.parse(messageString);
            const pathList = await pathParser(targetFsPath, { force });

            await handleWithPuppeteer({ onMessage, onEnd, pathList });
        } catch (error) {
            console.error('Error processing message:', error);
            socket.send(JSON.stringify({ error: 'Invalid message format' }));
        }
    });
};
이제 기존 웹 세션을 유지하면서 여러개의 테스트를 실행할 준비가 완료되었다.
위의 구현 자체는 코드에서 보이는 것처럼 그리 어렵지 않게 개발할 수 있었지만 프론트엔드에서 no-auth를 위한 session 개발, 세션을 유지하며 다른 테스트를 실행하기 위한 viewmodel, datamodel 생성, 실제 테스트를 위한 각종 testBed, testFunctions 등을 포함하여 다양한 개발사항들이 있었고 이 내용들을 개발, 수정하는데에 대부분의 시간이 소요되었다.
어찌되었건 개발이 완료되었으니 잘 동작하는지 확인해보자
테스트 실행 자체는 path만 있다면 앞에서 정의한 명령어를 사용하여 쉽게 실행시킬 수 있기에 여러개의 테스트가 존재하는 경로를 넣어 동작을 확인해보았다.
ecdev runTest [테스트 경로]

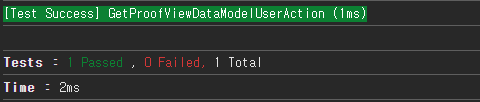
브라우저의 콘솔에서 각각의 유닛 테스트도 잘 동작하는 것을 확인할 수 있다.
다음에는 파일에서 F6과 같은 단축키를 통해 테스트를 바로 실행하는 것을 개발할 예정이다.
'frontend' 카테고리의 다른 글
| React Dev Tools는 정확한 성능 측정을 방해할 수 있다. (2) | 2024.10.24 |
|---|---|
| immer, Redux Toolkit 성능 문제 (0) | 2024.10.11 |
| 프론트엔드 전체 테스트 환경 구축해보기(2.CLI) (0) | 2024.08.30 |
| 프론트엔드 전체 테스트 환경 구축해보기(1.설계) (0) | 2024.08.22 |
| Strict Mode에서 useEffect가 2번 실행되는 이유 (0) | 2024.08.17 |